Finding, Using, and Designing with Custom Codes in Animal Crossing: New Horizons
There you are, surfing da webs when all of a sudden you see THIS:
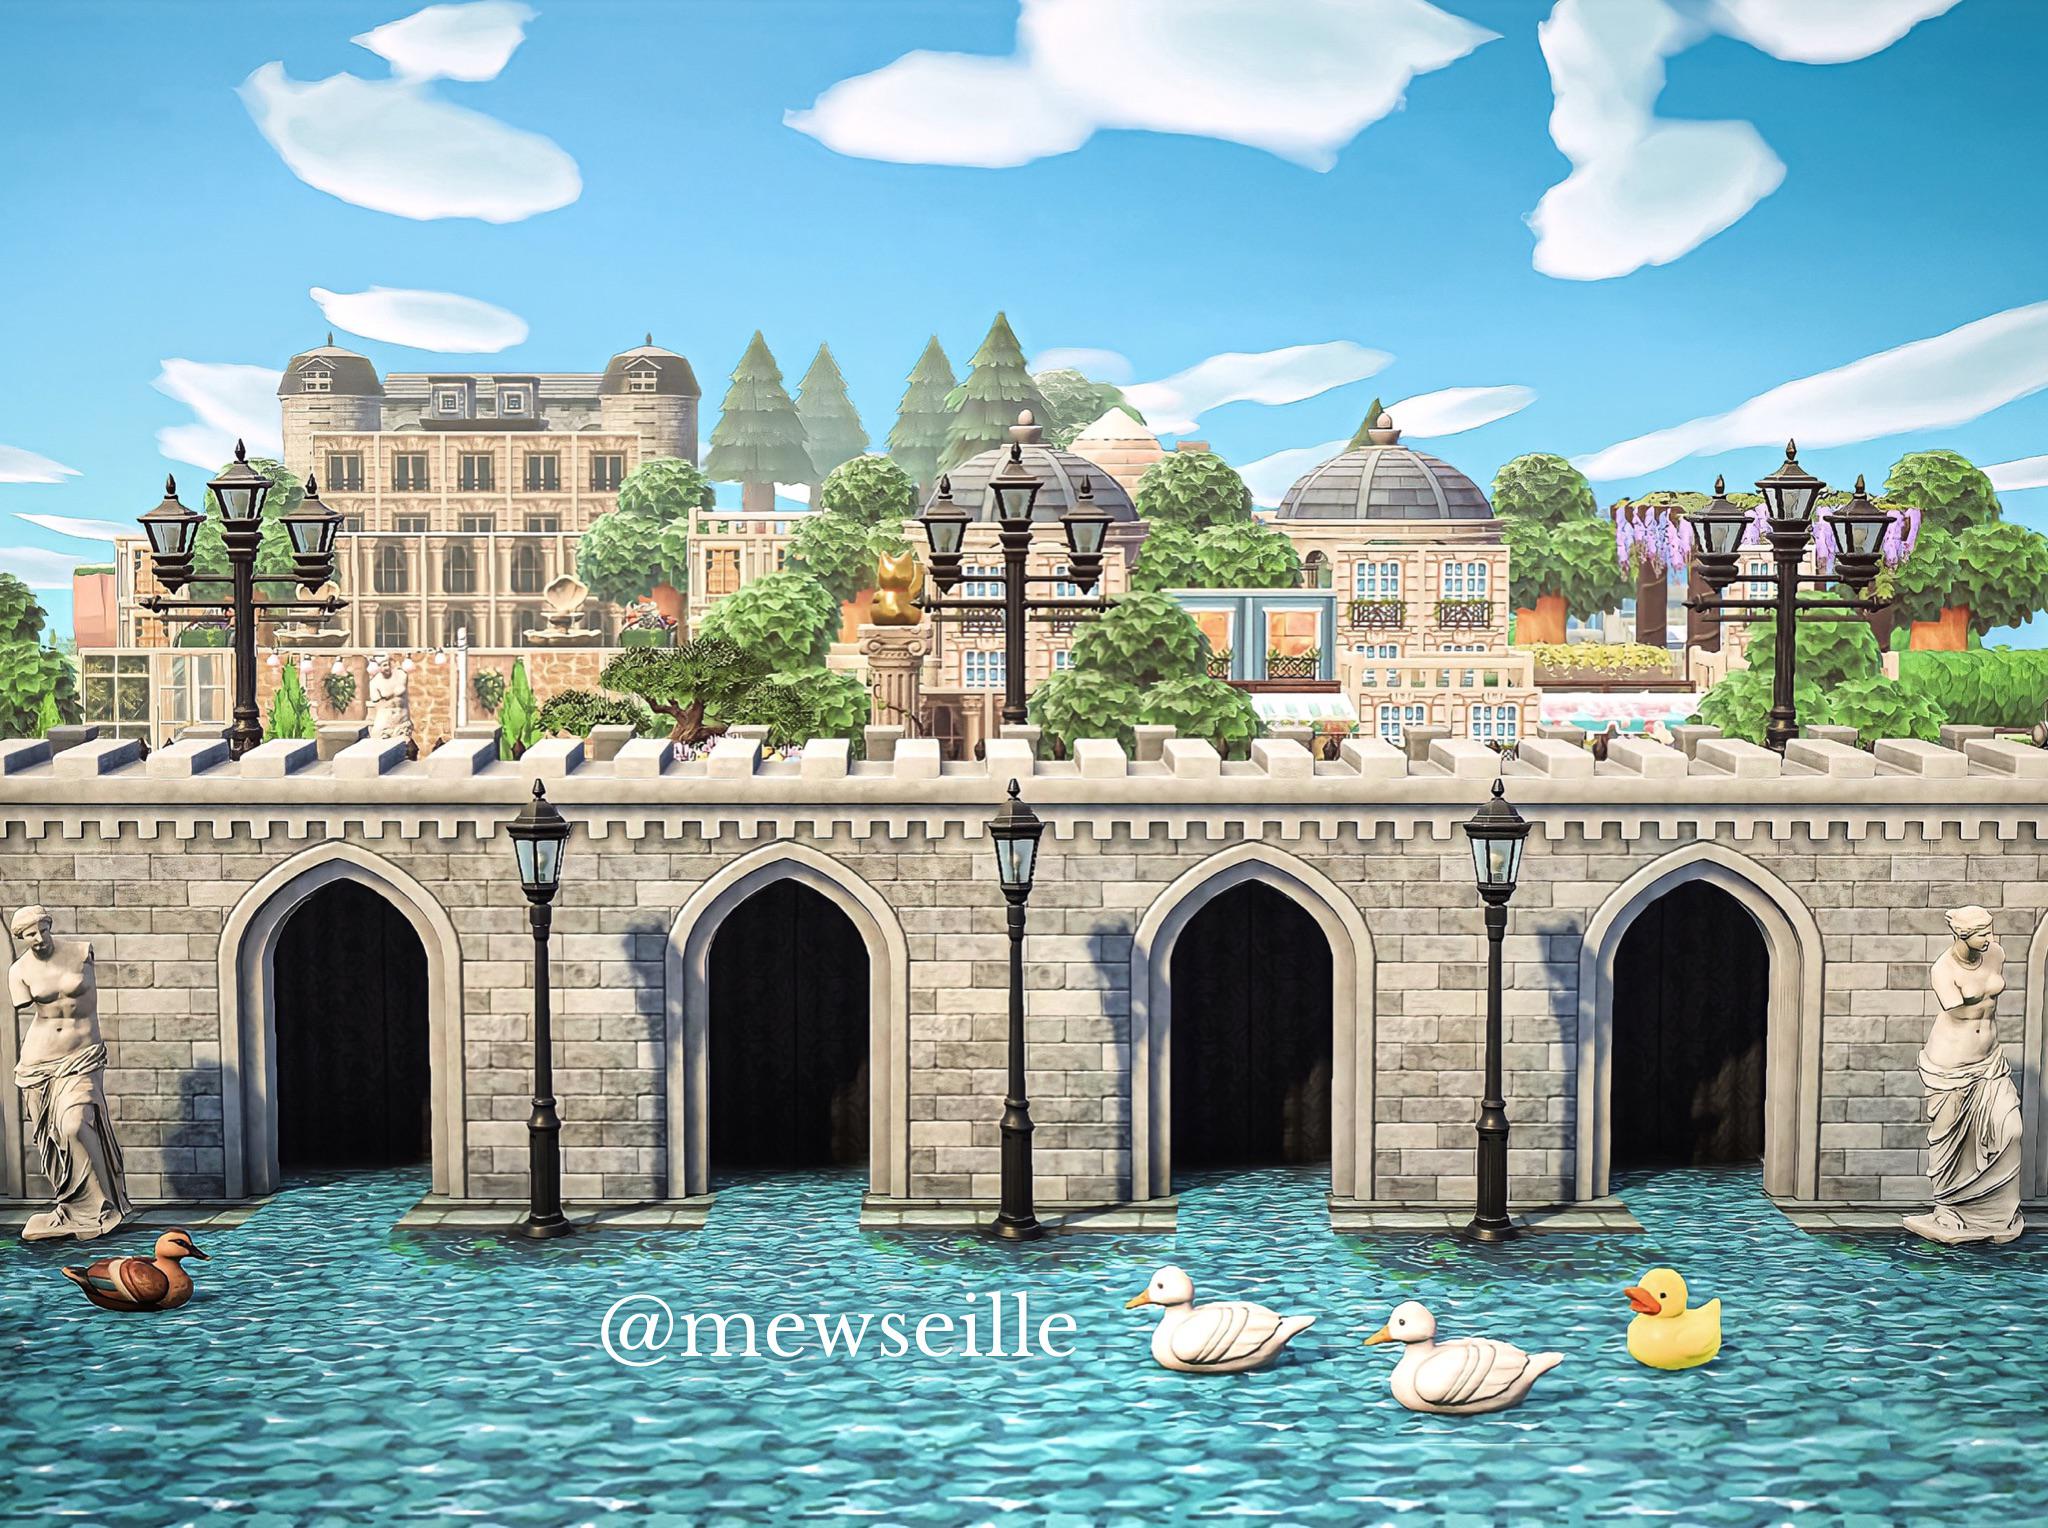
You wonder to yourself, "Am I even playing the same game as these people?" Codes, my dear friend, the wonderful world of Custom Design.
There’s a bit of magic (or maybe mystery!) about Animal Crossing: New Horizons (ACNH). Whether it’s intentional or just part of the game’s quirky charm, one thing’s for sure: figuring out custom codes can feel like a puzzle! It’s something I struggled with myself, and I know it keeps a lot of players from experiencing the full creative potential of the game. It’s often talked about but rarely explained—especially not by the game itself.
Custom codes, also known as “paths,” can be used as clothing, floor tile designs (invisible squares the game uses for item placement), customized onto simple panels to create building facades, and more. There are so many ways to use custom designs, and the creativity out there is endless! If, like me, you’ve been stumped on how people are crafting structures that look like buildings, making pools, or even adding a bus to their islands, then this article is for you.
IMPORTANT: Make sure you have all functions of the custom design portal unlocked in-game, for help on this see this article.
DOUBLE IMPORTANT: You’ll need an active Nintendo Online subscription and a stable internet connection, at least while downloading codes. Also, make sure you’ve unlocked Able Sisters’ shop.
How To Find Custom Codes
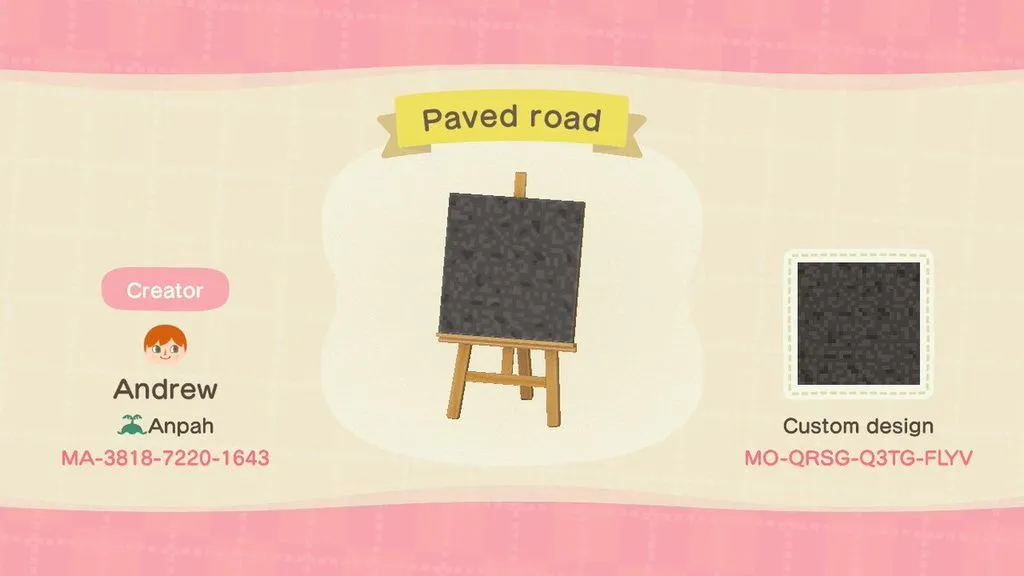
Custom codes look something like the image below. To “look them up” on your Nookphone or at the Design kiosk and bring them to your island, you can check out this helpful IGN article.
Pro Tip: The Creator Code will always start with the letters MA, while the Design Code will always begin with MO. The difference? The Creator Code shows you all the creations that person has ever uploaded, whereas the Design Code gives you access to a specific design, like the paved road below. I recommend using the Creator Code, as you never know what other cool designs you might stumble upon!
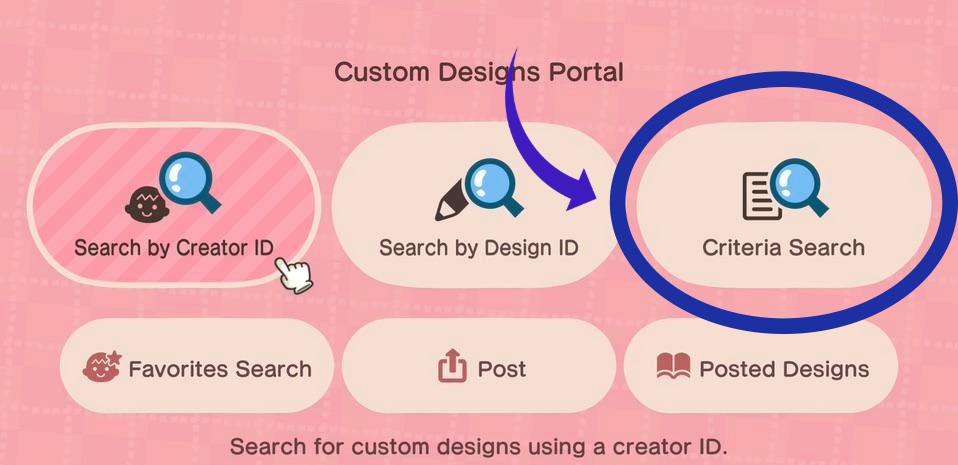
There are tons of ways players share codes, usually through social media or forums. But my favorite method is just Googling what I need! For example, I might search “red brick building code ACNH” and get a plethora of designs. When I find something I like, I make sure to record the Creator ID so that I can search in the Custom Designs Portal. Alternatively, if I’m looking for something simpler, like a picture of Blathers for instance, I'll use the custom design portal and search by criteria, no googling involved. That’s how I found the Blathers design on one light post and the Brewster design on the other (picture to come a little later!). The picture below shows exactly where to go in the portal to search by criteria.
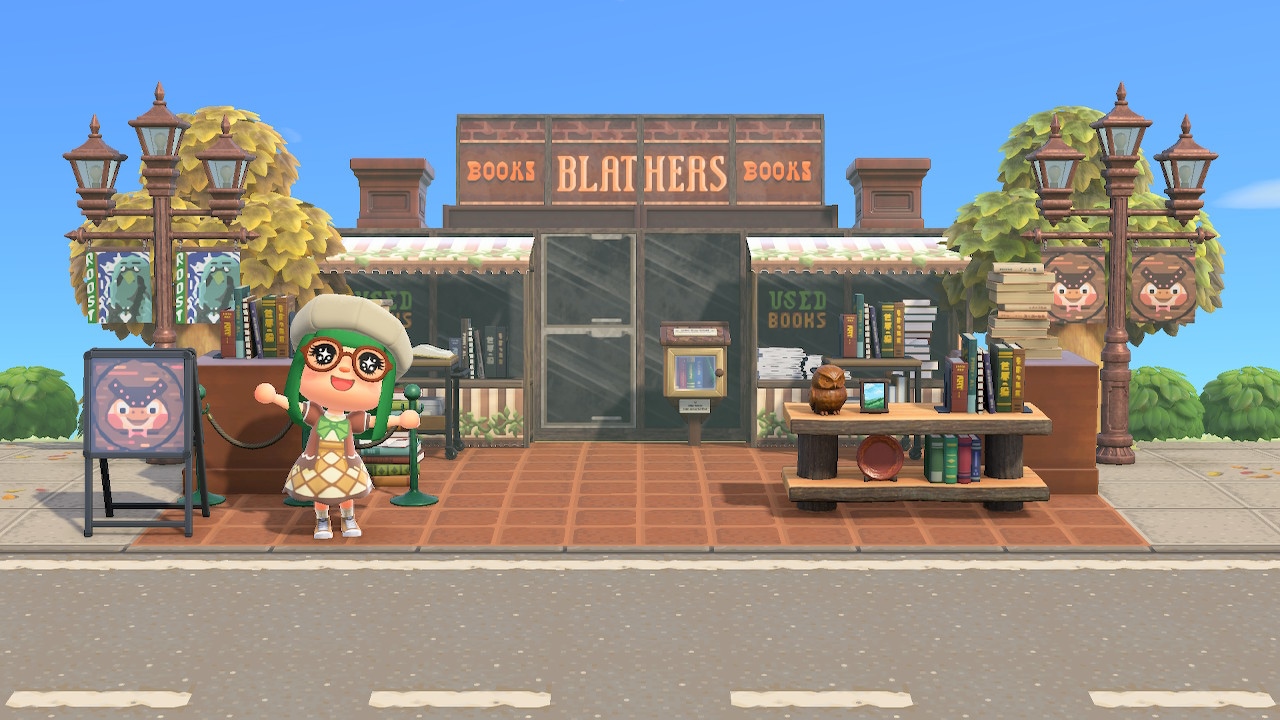
Alright, so with all that out of the way, let’s say you’re ready to dive in and use custom codes to create something like the picture below. I’ll walk you through exactly how I pulled it off, from crafting the building, to customizing items, to placing what looks like a road on the ground.
Step 1: Laying the Groundwork, Terraforming, and Customizing Panels
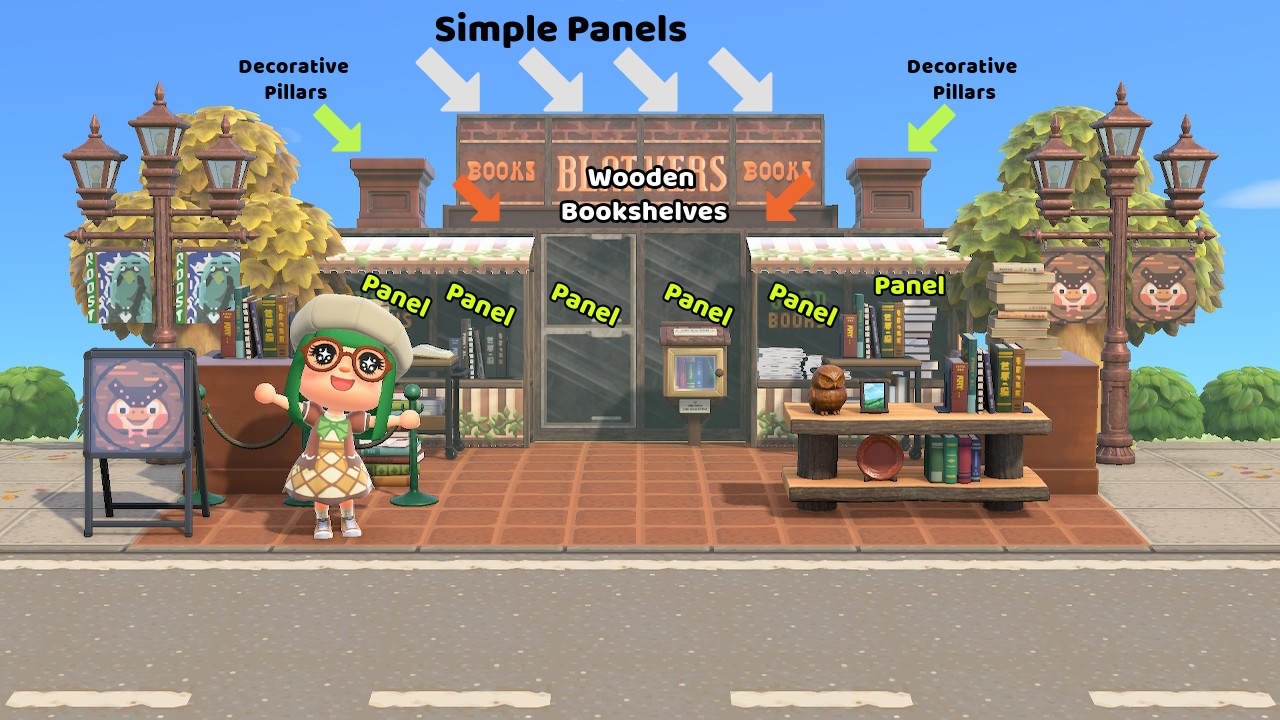
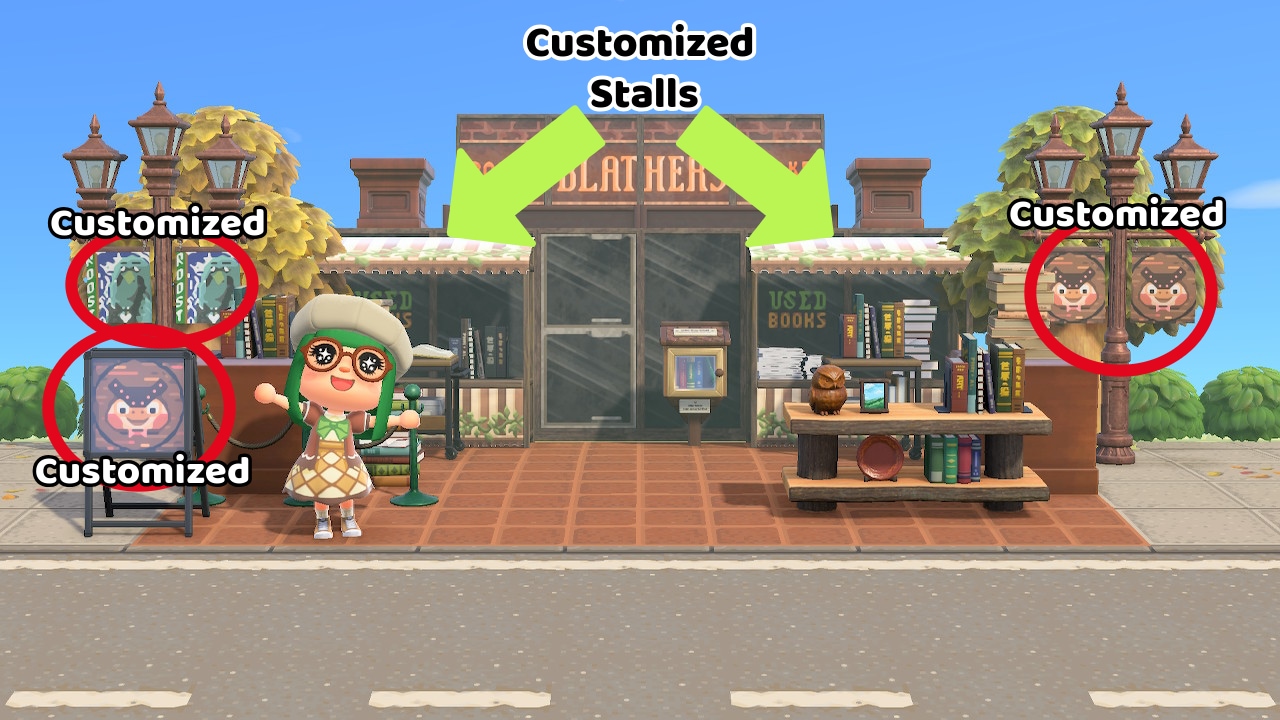
For the bookstore, I used ten Simple Panels (dark wood variant), two wooden bookshelves (turned backward so you only see the back), and two decorative pillars to nail that “brick building” look. This method is popular for custom facades—think windows, shelves, or walls. It’s always smart to stock up on Simple Panels and bookshelves; they’re essentials when using custom codes! The stalls that you see I will discuss in the next section.
Head over to any DIY workbench with your Simple Panels in hand, along with customization kits. Select “customize something” and scroll right to the pencil icon to access your custom paths (remember, we Googled and downloaded these designs to our portal!). Choose your designs here to apply them to the Simple Panels—now they’re ready to place!
In the ACNH community, there’s a technique I like to call “artfully deceptive design.” By creatively placing items like simple panels, decorative pillars, storefronts, stalls, bookshelves, and gazebos, you can make your designs look like entire buildings, cityscapes, and more! Once you get the hang of these basics, you’ll unlock a world of creative possibilities.
Terraforming Tip: To make the bookstore look like it has two stories, I terraformed behind the ground-level simple panels, climbed up with a ladder to the “second floor,” and placed four more panels for a shop "sign" reading “Blathers’ Books.” Layering is key to adding depth!
With these fundamentals, you’ll be well on your way to creating custom designs that look like magic but are just a few simple panels away!
Step 2: Customizing Certain Items to Display Custom Codes
Many items in ACNH can be customized. While some items are stuck in their original state, many can be altered to different color variants. But that’s not all, some special items allow you to take it a step further by applying patterns or custom codes! Here’s an exhaustive list of all the items in the game that can be customized with custom codes. This is how you might see someone change up a plain ol' stall item to perfectly match their build’s theme.
To get started, you’ll need your trusty DIY workbench, a stack of customization kits, and the items you want to customize. Select “customize something” and apply your custom code just like you did with the panels. Once you’re done, you’ll notice that customized items appear in your pocket as a lighter green compared to non-customized ones, making it easy to distinguish between them at a glance.
This part is super fun and, in my opinion, adds a truly unique touch to your designs. There’s an endless variety of ways to use the same items, as you can change key aspects to match your creative vision!
Step 3: Laying Down Your Paths
Although this is Step 3, you might actually consider starting here. There’s no “right” order in design! This is where we start transforming the space by customizing the flooring. The default grassy ground is lovely, but did you know you’re not limited to just the sand, wood, and dirt paths from the Island Contruction tool? That’s right! You can make things like a faux pool, a road for cars, or even a mythical fairy tale gumdrop lane for Beardo to prance through. The possibilities are endless!
There are two ways to lay down paths, one being through your nookphone using the design portal, but my go-to method is using the Island Construction app. Here, you can access your custom pathing by selecting the icon in the bottom right corner (as shown in the image below).
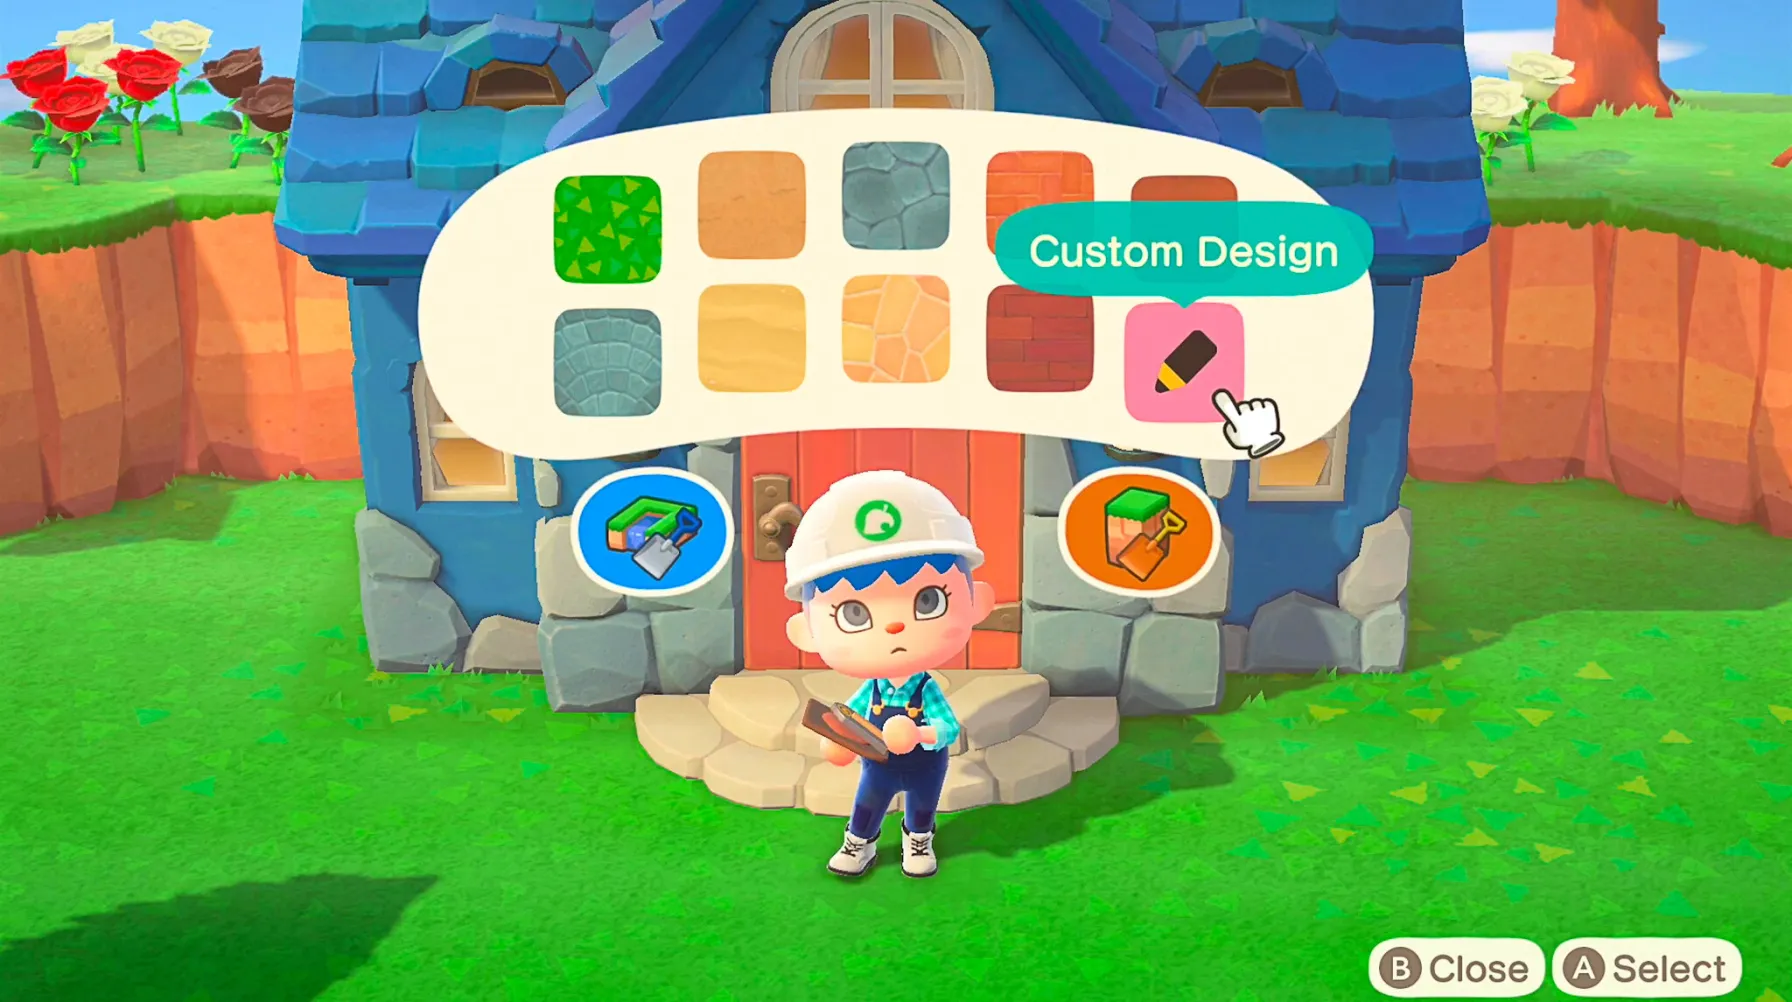
This tool lets you hold a “paver,” allowing your character to “lay down” pathing directly. It’s the easiest way to create paths, though there are two minor challenges: A) figuring out exactly how you want your path to look and B) switching between different paths. It takes a little practice, but once you get the hang of it, you’ll be glad you did!
In the Bookstore collection we've been dissecting, I used an asphalt road, brown tiles, and sidewalk paths to create a realistic cityscape effect.
Reminder: Although it's being referred to as a path, I'm still talking about custom codes!
But What About That Bus?
You didn’t think I’d forget to talk about the bus, did you?! Never! So, you’re officially a pro pather and ready for more? Let’s dive into the next layer of “artfully deceptive design”: using Pro Designs! This often-overlooked toggle in the design portal opens up new options, though it can be a bit confusing at first. You’ll know you’re in the Pro Designs section because the pencil icon has two little stars around it, as shown in the image below.
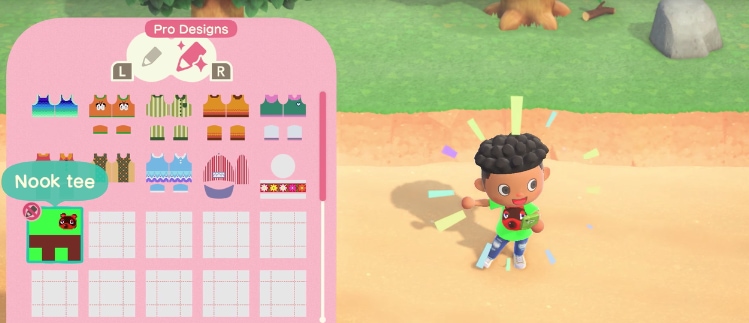
Important: You’ll need to toggle from regular designs over to Pro Designs by moving to the right using R. This is where most of the confusion happens, so don’t miss it!
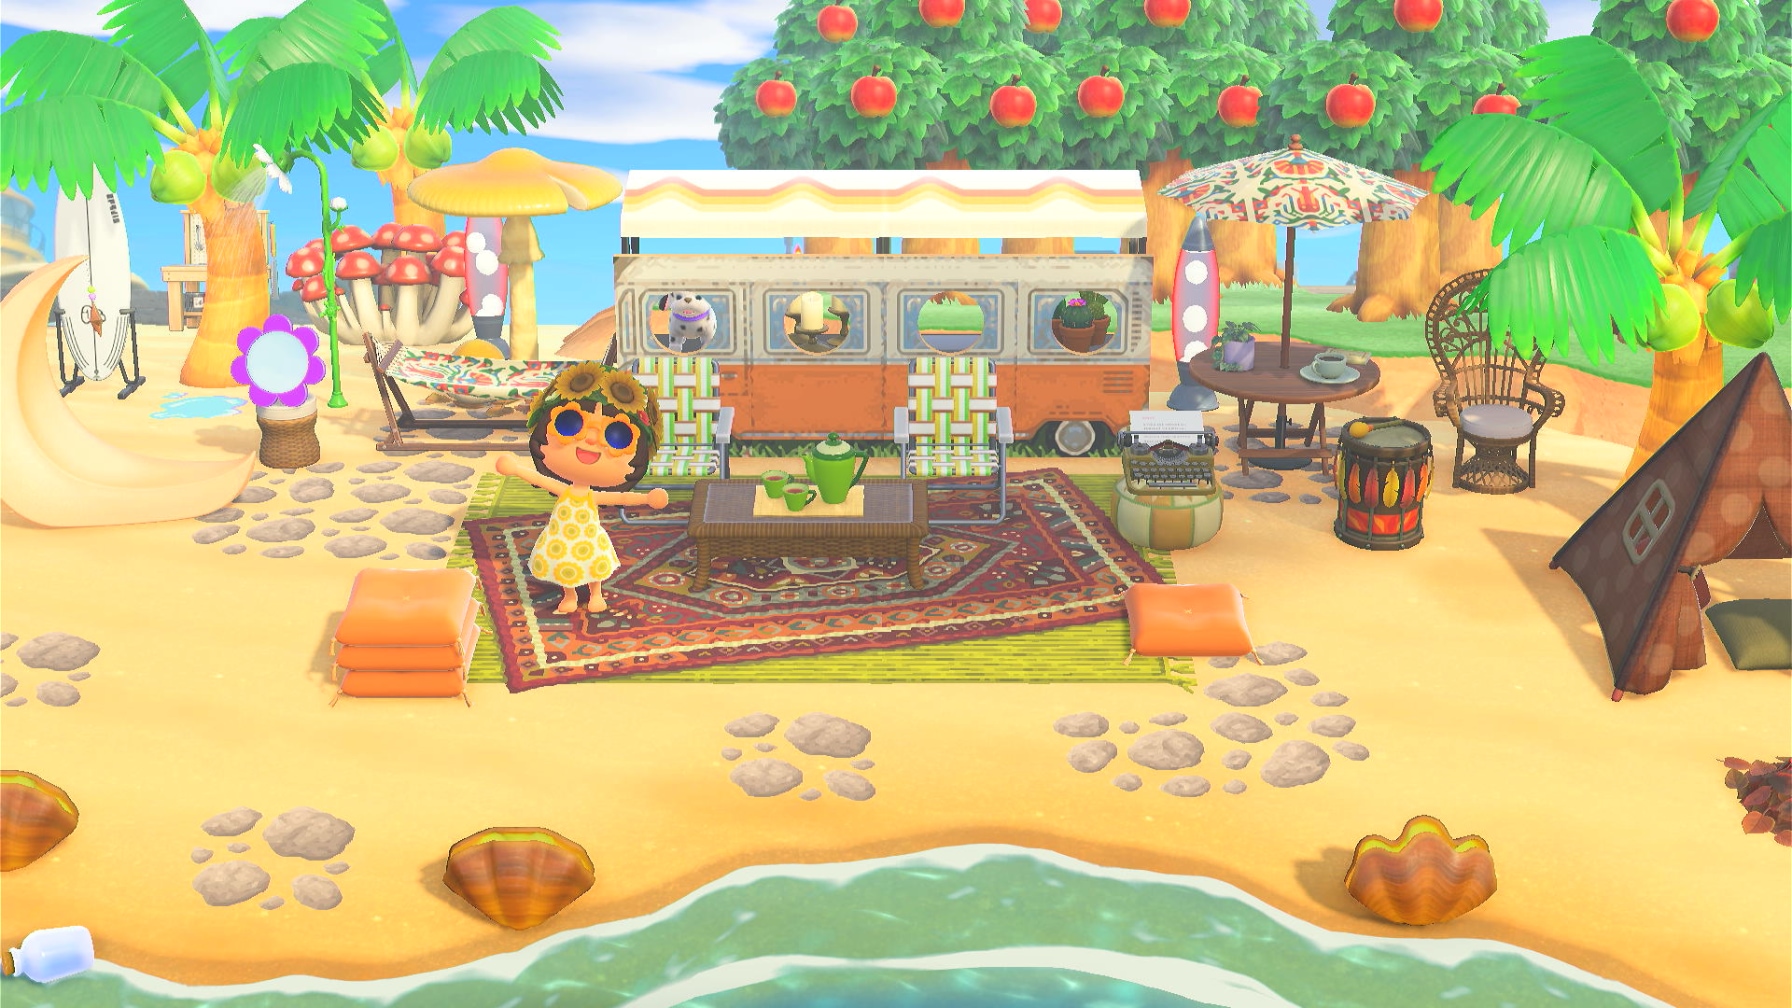
If you’re worried this sounds confusing, stick with me, dear reader, it gets better! In the Pro Designs section, in addition to clothing, you can create unique items like umbrellas that look like apple crates, or use face cut-out shapes for things like train windows, hippie vans, ships, and much more. This is how we created the “bus” you see in the 70s Hippie Collection. Those aren’t Simple Panels; they’re Pro Designs displayed as “face cut-outs” from the Design Portal. Artfully deceptive, indeed!
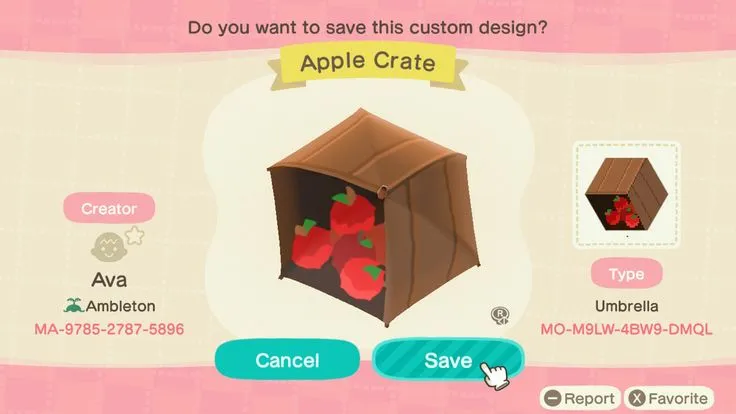
This is not a crate at all! It's an umbrella!
If you’ve made it this far, thank you for reading! I hope I’ve been able to help you add some extra flair to your island. That about sums it up—there are so many ways to get creative with these tools, and the possibilities are truly endless. Custom codes bring a whole new level of fun to the game, and I highly recommend diving in! Happy designing!